
Flowers
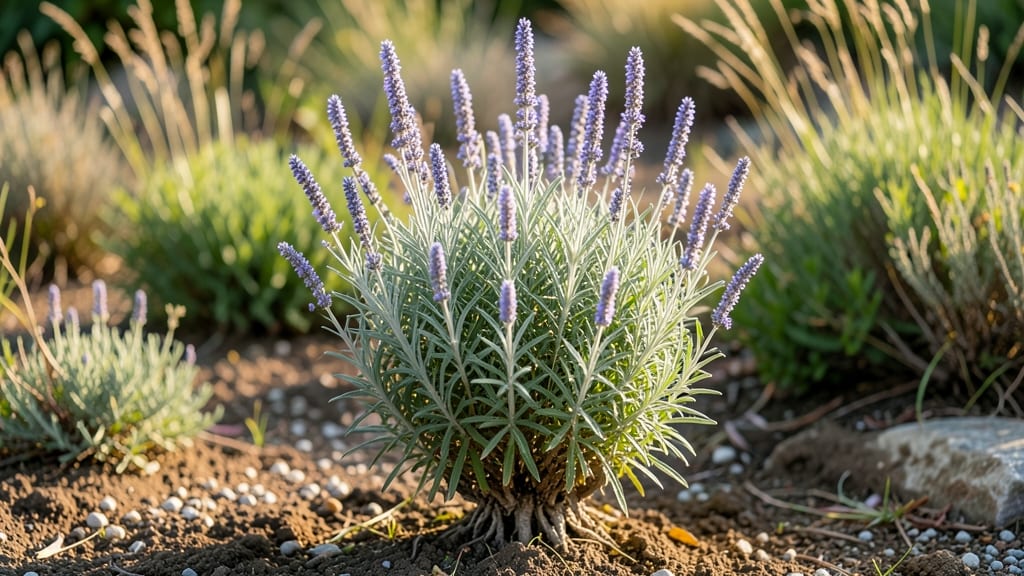
Russian sage's silvery-blue spikes transform my dry garden into a pollinator magnet. 🌿 This cold-hardy perennial thrives where others fail, with fragrant foliage that repels deer and attracts bees. The secret lies in its drought tolerance and adaptability—once established, it needs almost no care.
Plant in full sun with well-draining soil, and you'll see those signature blooms emerge by early summer. My 'Blue Spire' variety reaches 5 feet tall, creating a stunning vertical accent that lasts until frost. The key is spacing plants 3-4 feet apart to prevent overcrowding and encourage air circulation.
Prune back by one-third in early spring to promote bushier growth, and watch as the plant rebounds with even more vigor. The fragrance alone makes it worth growing—crush the leaves on a warm day, and you'll understand why gardeners swear by this plant.
Perfect for perennial borders, cottage gardens, or even as a low-maintenance hedge. Once you plant Russian sage, you'll wonder why you didn't add it sooner!
📚 In This Guide
- What you need
- Instructions
- Tips and common mistakes
- Wrapping up and next steps
What you need
- ● Russian Sage Plants: 3–5 healthy nursery-grown plants (choose Perovskia atriplicifolia varieties like 'Little Spire' or 'Blue Spire').
- ● Well-Draining Soil: 10–20 cubic yards of amended garden soil (mix 60% native soil + 30% compost + 10% coarse sand or perlite).
- ● Sunlight Spot: A full-sun location (6+ hours of direct sunlight daily).
- ● Watering Can or Hose: With a gentle spray nozzle (avoid overhead watering).
- ● Mulch: 2–3 inches of organic mulch (straw, pine needles, or shredded bark).
- ● Pruning Shears: Bypass pruners (sharp, clean, and sterilized with rubbing alcohol).
- ● Garden Gloves: Heavy-duty nitrile-coated gloves (protects from thorns and soil).
- ● Soil pH Test Kit: Russian Sage thrives in alkaline soil (pH 6.5–7.5).
- ● Fertilizer: Low-nitrogen, balanced fertilizer (e.g., 5-10-10, apply sparingly in early spring).
- ○ Stakes or Trellis: Optional for taller varieties (e.g., 4–6 ft bamboo stakes).
- ● Drip Irrigation System: Pro tip: 💡 Automates watering and saves time!
- ○ Compost Tea: Boosts soil health (optional but highly recommended for fragrant blooms).
Step-by-Step guide to planting and maintaining Russian sage perennials
Here’s how to establish hardy, fragrant Russian sage that blooms reliably for years with minimal fuss.
🌱 Step 1: Select the Perfect Planting Site
Russian sage thrives in full sun—at least 6-8 hours daily—and tolerates poor, dry soil better than most perennials. Choose a spot with well-draining soil; it despises soggy roots. I always test drainage by digging a 12-inch deep hole, filling it with water, and waiting for it to drain completely before planting.
This plant handles heat and drought once established, but the first year needs consistent moisture. Amend heavy clay with 2-3 inches of coarse sand or gravel to improve drainage. Avoid low-lying areas where cold air settles—Russian sage’s cold hardiness (USDA Zones 4-9) shines best in elevated, wind-protected spots.
🌿 Step 2: Plant at the Right Depth and Spacing
Dig holes twice as wide as the root ball but only as deep—planting too deep suffocates the crown. Gently loosen the roots if they’re circling tightly in the container. Space plants 3-4 feet apart; they spread slowly but grow upright and can shade out weeds over time.
Backfill with native soil mixed with a handful of slow-release granular fertilizer (5-10-10 ratio) to encourage strong root establishment. Water deeply immediately after planting to eliminate air pockets. You’ll know it’s right when the soil surface looks damp but not saturated.
☀️ Step 3: Water Deeply and Establish a Drought-Tolerant Routine
Keep the soil consistently moist for the first 4-6 weeks—water when the top 2-3 inches feel dry. After that, reduce watering to once every 1-2 weeks, unless your area experiences extreme heat. Overwatering is the fastest way to kill Russian sage; it’s adapted to survive on minimal moisture once roots are deep.
Mulch with 2-3 inches of gravel or coarse bark (organic mulch can rot and smother the crown). This helps regulate soil temperature and discourages weeds. By the second year, you’ll rarely need to water unless there’s a prolonged drought.
✂️ Step 4: Prune for Health and Abundant Blooms
Cut back the previous year’s growth by one-third in early spring before new shoots emerge. This encourages bushier growth and prevents the plant from becoming leggy. Deadhead spent blooms in late summer to extend the flowering season, but leave some seed heads for winter interest and wildlife.
Russian sage rarely needs division, but if the center becomes bare after 5-7 years, dig up the plant, separate the clumps, and replant. The best time is in early spring or fall when temperatures are mild. You’ll notice a burst of new growth within weeks.
🌱 Step 5: Overwinter for Next Year’s Growth
No special winter care is needed—Russian sage is one of the toughest perennials for cold climates. In Zone 4, add a 2-3 inch layer of mulch around the base in late fall to protect the crown from extreme temperature swings. In warmer zones, a light pruning in late winter keeps the plant tidy.
Come spring, you’ll see fresh green shoots emerge even before the soil warms. This is your cue to reduce mulch and resume regular care. Russian sage’s ability to bounce back from neglect makes it a low-maintenance star in any perennial border.
Tips & tricks for perfect Russian sage perennial planting
These hard-won lessons will help you skip the common pitfalls and grow Russian sage that thrives for decades.
Site Selection Secret: That 6-8 hours of full sun requirement is non-negotiable—partial shade will turn your fragrant beauty into a weak, leggy shadow of itself. I've seen Russian sage in my Zone 6 garden handle 100°F heat waves with ease, but even a few hours of afternoon shade can reduce flowering by half. Look for spots where morning sun warms the soil gradually rather than baking it instantly.
Drainage Test: The 12-inch deep drainage test in Step 1 is worth repeating—I've buried plants in what I thought was "well-draining" soil only to watch them rot within weeks. For heavy clay soils, mix in that 2-3 inches of coarse sand or gravel right into the planting hole, not just around the edges. This creates a drainage pathway that lasts for years, not just the first growing season.
Mulching Wisdom: That 2-3 inches of gravel or coarse bark mulch serves double duty: it regulates soil temperature AND prevents crown rot from organic mulch. I've noticed my plants in full sun stay 10-15°F cooler at the base with this method, which is crucial during summer heatwaves. The key is keeping it loose—packed mulch smothers the roots and traps moisture against the crown.
Pruning Timing: That one-third early spring pruning in Step 4 creates the perfect balance—cut too much and you'll sacrifice next year's blooms, cut too little and you'll get that leggy look. I mark my calendar for the first week of April when the new shoots are about 2 inches tall. For deadheading, I wait until after the first flush of blooms in late summer to ensure pollinators have plenty to feed on.
Pro Tips for Russian Sage Perennial
- These hard-won lessons will help you skip the common pitfalls and grow Russian sage that thrives for decades.
- Site Selection Secret: That 6-8 hours of full sun requirement is non-negotiable—partial shade will turn your fragrant...
- Drainage Test: The 12-inch deep drainage test in Step 1 is worth repeating—I've buried plants in what I thought was "...
Frequently asked questions
about Russian sage—because every gardener deserves a little clarity!How cold-hardy is Russian sage really?
Russian sage (Perovskia atriplicifolia) is USDA zones 4-9 hardy, meaning it survives winter temps as low as -30°F (-34°C)! Just ensure it’s planted in well-draining soil—poor drainage can cause root rot even in cold climates. Mulch lightly in winter for extra protection.
When is the best time to plant Russian sage?
Plant in early spring or early fall for optimal root establishment. Avoid summer heatwaves, which stress young plants. If transplanting mature sage, water deeply 1-2 weeks before moving to reduce shock. Pro tip: Prune back by 1/3 before planting to encourage bushier growth!
Can I grow Russian sage in containers?
Use a large container (at least 12" deep) with fast-draining mix (add perlite or sand). Choose a pot with drainage holes, and fertilize lightly in spring with low-nitrogen fertilizer. Containers dry out faster, so water when the top 2 inches of soil feel dry.
Why is my Russian sage turning brown or crispy?
Brown edges or stems usually mean underwatering or overwatering. Check soil moisture—sage prefers dry conditions once established. Other culprits: fungal issues (like powdery mildew) or salt buildup from tap water. Prune affected stems and improve airflow around the plant.
What’s a good alternative if I want purple blooms but hate deadheading?
Try Lavender (Lavandula) or Catmint (Nepeta)—both thrive in poor soil, love heat/drought, and self-clean (no deadheading needed!). Russian sage does benefit from light pruning post-bloom, but these perennials are even lower-maintenance for lazy gardeners.
Wrapping up and next steps
Russian sage is a low-maintenance, cold-hardy perennial that brings effortless beauty and fragrant charm to any garden. Whether you're drawn to its drought-resistant nature, vibrant purple blooms, or pollinator-friendly appeal, this plant is a game-changer for gardeners of all levels. 🌿✨
Ready to transform your outdoor space? Start by choosing the right spot and gathering your supplies—then dive in with confidence! Your future garden (and pollinators!) will thank you.