
Fertilization
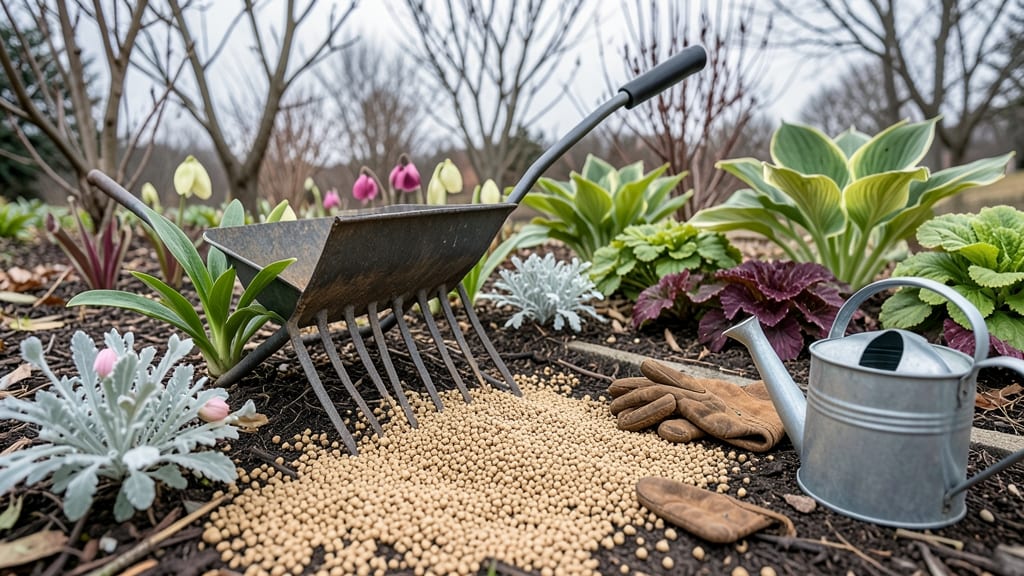
Late winter is when perennials wake up hungry—before they even show leaves. 🌱 The best perennials late winter fertilizer isn’t just about blooms; it’s about giving roots a cold-start boost that fuels growth for the whole season.
I’ve seen plants that struggle in summer thrive because of this one simple timing trick. Most gardeners wait until spring, but that’s too late. A slow-release organic fertilizer applied now feeds roots steadily as they wake, while synthetic options can burn tender new growth.
Think of it like giving your plants a jump-start before the real race begins—stronger roots mean bigger blooms and fewer pests later. You’ll notice new shoots within 3-4 weeks, and established perennials will rebound faster after winter.
The key is working fertilizer into damp soil (not dry) and watering it in well to avoid surface crusting. This timing also helps deter early pests by keeping plants vigorous from day one. Works for everything from daylilies to coneflowers—just adjust the amount based on plant size.
Here’s how to do it right without overdoing it.
📚 In This Guide
- What you need
- Instructions
- Tips and common mistakes
- Wrapping up and next steps
What you need
- ● Late-winter fertilizer: 1–2 lbs of a balanced, slow-release granular fertilizer (e.g., 10-10-10 or 5-5-5 NPK ratio) or
- ● 1–2 gallons of liquid organic fertilizer (e.g., fish emulsion, seaweed extract, or compost tea).
- ● Garden gloves: 1 pair (nitrile or leather for durability).
- ○ Handheld spreader or broadcast spreader: For even distribution (optional but highly recommended for precision).
- ● Watering can or hose with a gentle spray nozzle: 5+ gallons of water (or as needed for application).
- ● Pruners or shears: 1 pair (sterilized with rubbing alcohol) to trim dead foliage.
- ● Garden fork or trowel: 1 (for loosening soil in compacted areas).
- ● Measuring cup or scale: For accurate fertilizer dosing (critical for avoiding over- or under-application!).
- ● Weather check: A forecast predicting no rain for 24–48 hours (fertilizer needs time to absorb!).
- ● Soil test kit: To check pH and nutrient levels before fertilizing (ideal pH for most perennials: 6.0–7.0).
- ● Mulch (straw, shredded leaves, or pine needles): 2–3 inches to retain moisture and regulate soil temp.
- ● Epsom salt (magnesium sulfate): 1 tbsp per gallon of water (for magnesium-deficient perennials like hostas or daylilies).
- ● Compost or worm castings: 1–2 cups mixed into soil for organic matter boost.
- ● Knee pads or stool: For comfort during long sessions.
Step-by-Step guide to late winter fertilizing for perennial blooms
Here's how to give your perennials the cold-weather boost they need for vibrant, long-lasting blooms.
🌱 Step 1: Choose the Right Fertilizer for Late Winter
For late winter feeding, I always reach for a balanced, slow-release fertilizer with equal parts nitrogen, phosphorus, and potassium (like a 10-10-10 or 5-5-5 formula). This gives perennials a gentle but steady energy boost without burning tender new growth. Avoid high-nitrogen fertilizers—they encourage leafy growth at the expense of flowers, which is the last thing you want in late winter.
I also add a handful of bone meal to the mix for phosphorus, which helps roots establish strong connections before spring. Sprinkle the fertilizer evenly over the soil surface, about 3-4 inches away from plant stems to prevent direct contact. This ensures nutrients reach the roots without irritating the crown.
💧 Step 2: Prepare the Soil Before Applying Fertilizer
Start by raking back the mulch layer—just enough to expose the soil surface. You don’t need to dig deeply; a light raking loosens the top inch of soil, making it easier for roots to absorb nutrients. If the ground feels frozen or rock-hard, wait a few more days until it thaws naturally. Wet, cold soil compacts easily and can suffocate roots.
Next, water the area lightly until the soil is moist but not soggy—about ½ inch of water. This prepares the soil to receive the fertilizer without washing it away. I like to do this in the late afternoon so any excess moisture evaporates overnight, reducing the risk of fungal issues.
☀️ Step 3: Apply Fertilizer and Re-Mulch Strategically
Spread the fertilizer evenly over the soil, using about ½ cup per mature plant (or follow the label’s guidelines for your specific product). For smaller perennials or newly planted divisions, cut that amount in half. Gently work the fertilizer into the top ½ inch of soil with a hand rake, being careful not to disturb the roots.
After fertilizing, reapply the mulch layer, this time spreading it 2-3 inches deep around the base of the plants. Mulch helps regulate soil temperature, retains moisture, and prevents fertilizer from washing away during sudden rain. I always leave a 1-inch gap around the stem to avoid rot—this is a common mistake that can kill perennials before they even bloom.
⏰ Step 4: Monitor and Adjust for Spring Growth
Over the next 2-3 weeks, keep an eye on your perennials for signs of new growth. You’ll notice tender shoots emerging from the soil and leaves unfolding with a deeper green color. This is your cue that the fertilizer is working! Water lightly every 5-7 days if rainfall is scarce, ensuring the soil stays consistently moist but not waterlogged.
If you see yellowing leaves or stunted growth, you’ve overdone it with fertilizer. Cut back on watering slightly and avoid adding more nutrients until the plants show stronger recovery. The goal is to support steady, healthy growth—not a sudden nutrient rush that stresses the plants.
Tips & tricks for perfect late winter fertilizing
Took me a while to figure these out, so here's how to get the most out of your late winter fertilizer without stressing your perennials.
Fertilizer Precision: When you're spreading that balanced 10-10-10 or 5-5-5 formula in Step 1, measure carefully—too much nitrogen can ruin your flower production. I like to use a small kitchen scale for accuracy, especially when dividing the fertilizer for smaller plants. Remember, you're aiming for about ½ cup per mature plant, but don't eyeball it. A little goes a long way with perennials!
Soil Temperature Check: Before you start Step 2, test your soil temperature with a soil thermometer. Ideal working temperature is around 50-55°F—any colder and the fertilizer won't activate properly. If your soil is still frozen, wait a few more days. I've learned this the hard way after seeing fertilizer just sit there doing nothing when the ground was too cold.
Mulch Layer Strategy: When reapplying that 2-3 inch mulch layer in Step 3, use a mix of organic mulch like straw or shredded leaves. This breaks down slowly and adds nutrients as it decomposes. The key is to keep that 1-inch gap around stems—this prevents rot while still protecting roots from temperature swings. I like to spread mulch in the late afternoon when temperatures are cooler.
Growth Monitoring: During that critical 2-3 week monitoring period in Step 4, keep a small notebook by your garden. Record what you see—when those first tender shoots appear, when leaves unfurl, and when flowers start to form. This helps you track progress and spot problems early. I've noticed that perennials fertilized in late winter often bloom about 2 weeks earlier than those fertilized in spring!
Pro Tips for Best Perennials Late Winter Fertilizer
- Took me a while to figure these out, so here's how to get the most out of your late winter fertilizer without stressi...
- Fertilizer Precision: When you're spreading that balanced 10-10-10 or 5-5-5 formula in Step 1, measure carefully—too ...
- Soil Temperature Check: Before you start Step 2, test your soil temperature with a soil thermometer. Ideal working te...
Frequently asked questions
about late-winter fertilizing for perennials—because even the best gardeners need a little clarity! Here are answers to the most common questions to help you prep like a pro.When is the exact best time to fertilize perennials in late winter?
The ideal window is 4–6 weeks before your last expected frost, typically late February to early March in most zones. This gives roots time to wake up and absorb nutrients before active growth begins. Pro tip: If you’re unsure, aim for when soil is workable but still cool (around 40–50°F).
Can I use the same fertilizer I use in spring for late-winter feeding?
Not always! Late-winter fertilizers should be low in nitrogen (N) (look for a ratio like 5-10-10 or 10-20-20) to avoid encouraging tender new growth that could be damaged by frost. Slow-release or organic options (like compost or bone meal) are also great choices for a gentle boost.
What if I missed the late-winter window—can I still fertilize?
If you skip late-winter feeding, spring is the next best time (as soon as soil is workable). Just avoid fertilizing too late—stop by 6–8 weeks before your first frost to let perennials harden off for winter. Think of it as a "do-over" with no penalties!
Are there any perennials that don’t need late-winter fertilizer?
Yes! Perennials that are low-maintenance or slow-growing (like lavender, sedum, or Russian sage) often thrive without extra late-winter feeding. Also, well-established plants (3+ years old) may only need a light top-dressing of compost. Always check the plant’s specific needs—some, like peonies, prefer minimal intervention.
What if my perennials look burned or wilted after fertilizing?
This usually means over-fertilizing or using a high-nitrogen product too early. Flush the soil with water to dilute excess salts, and hold off on fertilizing for 4–6 weeks. For future sessions, start with half the recommended dose and monitor closely. Organic fertilizers (like fish emulsion) are gentler if you’re worried about sensitivity.
Wrapping up and next steps
Late winter is the perfect time to give your perennials the nutrient kickstart they need for a vibrant, long-lasting bloom season!
By choosing the right fertilizer—whether it’s organic matter, slow-release granules, or liquid feeds—you’re setting your plants up for healthier roots, stronger stems, and show-stopping flowers. 🌸 Don’t wait until spring to act; a little effort now means months of effortless beauty in your garden.
Ready to transform your garden? Start by testing your soil, pick your fertilizer, and apply it with confidence. Then, check out our guide on post-fertilizer care to keep your perennials thriving all year round!