
Planting
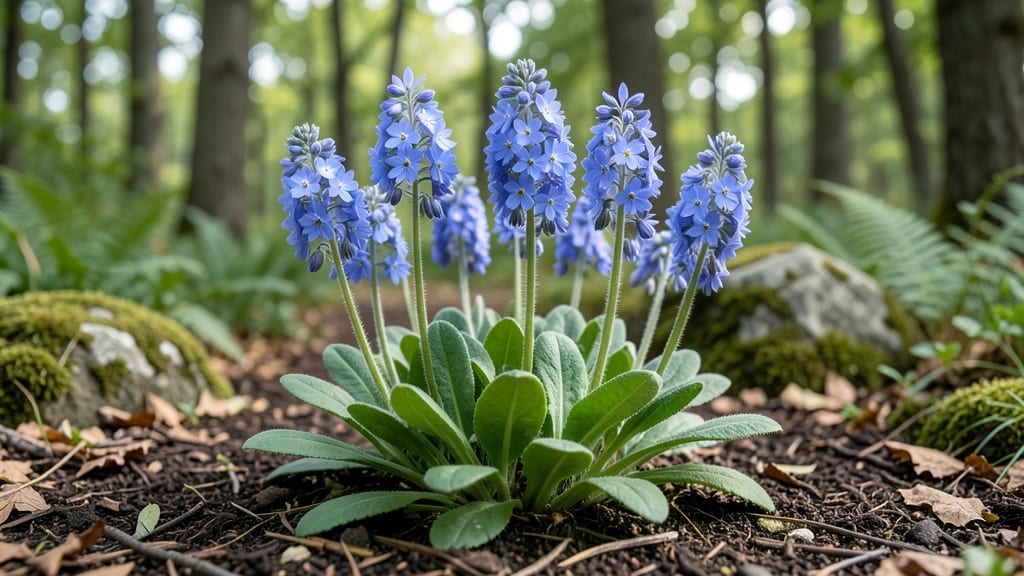
The perennial forget-me-not plant is the cold-hardy blue bloom that keeps coming back year after year without replanting. 💙 I adore how they spread effortlessly in shady spots where most flowers struggle, turning neglected corners into bursts of color that last from spring through summer.
These little powerhouses thrive in partial shade and moist, well-draining soil—think woodland edges or cottage garden borders. They self-seed like crazy, creating natural drifts that look like someone sprinkled fairy dust across your yard. The key is keeping them consistently moist during their first growing season.
By late spring, you'll see delicate blue flower spikes rising above the foliage, each one a tiny reminder of why gardeners fall in love with perennials. They pair beautifully with hostas, ferns, and other shade-loving plants, creating a dreamy, low-maintenance garden scene.
Whether you're filling gaps between shrubs or lining a path, forget-me-nots deliver four seasons of interest—spring blooms, summer foliage, autumn seed heads, and winter dormancy that still looks tidy. Let's get them growing!
📚 In This Guide
- What you need
- Instructions
- Tips and common mistakes
- Wrapping up and next steps
What you need
- ● Perennial forget-me-not plants: 1–5 nursery-grown plants (check for Myosotis sylvatica or Myosotis scorpioides varieties)
- ● OR seeds (1–2 packets, ~500–1,000 seeds per packet)
- ● Well-draining soil: Mix of garden soil, compost, and perlite (1 part perlite per 3 parts soil)
- ● Organic fertilizer: Balanced 10-10-10 or slow-release granular (1 cup per 5 sq ft)
- ● Watering can or hose with gentle spray nozzle
- ● Mulch: 2–3 inches of shredded bark or straw (to retain moisture and suppress weeds)
- ● Garden trowel or hand shovel
- ○ Gloves (optional but recommended for seed handling)
- ● Measuring tape or ruler (for spacing plants 12–18 inches apart)
- ● Pruners (for trimming dead blooms or overgrowth)
- ● Spray bottle (for misting seeds if starting indoors)
- ● Grow lights or seed-starting tray (if sowing indoors 6–8 weeks before last frost)
- ● Epsom salt (1 tbsp dissolved in 1 gallon of water for magnesium boost)
- ● Companion plants like heuchera or hostas (for shade-loving forget-me-nots)
- ● Plant markers (to label varieties if testing multiple types)
How to plant and maintain perennial forget-me-nots for reliable returns
These delicate blue blooms thrive with minimal fuss—just follow my battle-tested approach.
🌱 Step 1: Select the Perfect Planting Spot
Forget-me-nots adore partial shade—think 3-6 hours of morning sun with afternoon shade protection. They tolerate full shade in hot climates but may produce fewer blooms. I always check the soil first: these plants hate soggy roots, so avoid low spots where water pools.
Test your soil's moisture by digging a 6-inch hole. If water lingers after 24 hours, amend with 1 inch of compost to improve drainage. Forget-me-nots prefer slightly acidic to neutral soil (pH 6.0-7.0), so a simple pH test kit ensures you're in the right range.
🪴 Step 2: Prepare the Soil and Plant Correctly
Loosen the soil to a depth of 12 inches using a garden fork—this prevents root restriction as plants establish. For 4 plants, mix 2 gallons of compost into the top 6 inches of soil. Forget-me-nots have shallow roots, so don't dig deeper than necessary.
Space plants 12-18 inches apart in rows 18 inches apart to allow airflow and easy maintenance. Dig holes just deep enough to accommodate the root ball—planting too deep suffocates the crown. Water each hole thoroughly before inserting plants to eliminate air pockets.
☀️ Step 3: Water and Mulch for First-Year Establishment
Water newly planted forget-me-nots deeply every 2-3 days until new growth appears—about 2-3 weeks. You'll know moisture is right when the top 1 inch of soil feels damp but not soggy. Overwatering in the first year leads to root rot before plants can establish.
Apply 2 inches of mulch (like shredded bark or straw) around each plant, keeping it 3 inches away from stems to prevent rot. This conserves moisture and suppresses weeds without smothering the shallow roots. Replenish mulch annually in early spring.
✂️ Step 4: Prune and Feed for Continuous Blooms
Deadhead spent blooms by snipping stems back to the first set of healthy leaves every 2 weeks during the growing season. This encourages more flowers and prevents seed formation, which can weaken perennial plants. I use clean, sharp scissors to avoid damaging stems.
Fertilize lightly in early spring with 5-10-10 fertilizer at half the recommended rate—too much nitrogen produces lush foliage but fewer blooms. Forget-me-nots are low-maintenance perennials that rarely need supplemental feeding after establishment.
⏰ Step 5: Prepare for Winter Dormancy
In fall, cut back faded foliage to 2-3 inches above ground level after the first frost. This prevents disease buildup in dead stems while allowing the crown to overwinter. Forget-me-nots are USDA zones 3-8 hardy, so they'll return reliably if protected from winter moisture.
Apply 1 inch of extra mulch in late fall to insulate roots from temperature swings. In extremely cold climates (zone 3), a light covering of straw over the mulch provides additional protection. Avoid heavy mulch piles that can suffocate crowns.
Tips & tricks for perfect perennial forget-me-not planting
Common pitfalls—and how to sidestep every one when growing these reliable bloomers.
Sunlight Strategy: In Step 1, the 3-6 hours of morning sun is non-negotiable for vibrant blooms, but here's the thing: I've found that in hotter climates, even 3 hours can be too much. If your area gets intense afternoon sun, consider placing plants where they receive only 2-3 hours of morning sun and full afternoon shade. This prevents the delicate foliage from scorching while maintaining those signature blue flowers. Think of it as a sun protection plan for your forget-me-nots.
Soil Test Timing: That 24-hour moisture test in Step 1 might seem like a long wait, but it's worth it. I learned this the hard way after planting in what I thought was well-draining soil—only to watch my plants struggle with root rot. Pro tip: Test your soil's drainage in the same spot where you plan to plant. If water disappears within 30 minutes, your soil drains too quickly and needs organic matter. If it's still damp after 24 hours, you need to improve drainage with sand or gravel.
Planting Depth Visual: In Step 2, planting too deep suffocates the crown, but how do you know when it's just right? Here's what nobody tells you—look for the soil line on the root ball. When you remove the plant from its container, there should be a visible line where the soil meets the roots. Plant so this line sits just above the surrounding soil level. This ensures proper airflow to the crown while keeping roots covered.
Mulch Layering: The 2 inches of mulch in Step 3 is perfect, but I've found that adding a thin layer of coarse sand or small gravel right under the mulch creates a drainage barrier. This prevents the mulch from staying too wet against the stems, which can cause rot. Think of it as creating a little breathing room between your plants and their mulch blanket. Just keep the gravel layer thin—about ½ inch—and don't let it touch the stems.
Pro Tips for Perennial Forget Me Not Plant
- Common pitfalls—and how to sidestep every one when growing these reliable bloomers.
- Sunlight Strategy: In Step 1, the 3-6 hours of morning sun is non-negotiable for vibrant blooms, but here's the thing...
- Soil Test Timing: That 24-hour moisture test in Step 1 might seem like a long wait, but it's worth it. I learned this...
Frequently asked questions
Got questions about growing perennial forget-me-nots? You’re not alone! Here are some of the most common queries—plus straightforward answers to help you cultivate these charming, cold-hardy blooms with confidence.
How do I keep forget-me-nots blooming year after year?
Perennial forget-me-nots thrive in consistent moisture and partial shade. Deadhead spent blooms in early summer to encourage more flowers, and mulch lightly in winter to protect roots. With proper care, they’ll return vibrantly for 3–5 years (or longer!).
Are forget-me-nots truly cold-hardy? What zones do they tolerate?
Yes! These resilient plants handle USDA Zones 3–8, making them ideal for northern climates. They’ll even survive light frosts and snow. Just ensure well-draining soil—waterlogged roots are their biggest enemy.
Can I grow forget-me-nots in containers? What’s the best pot size?
Use a 10–12 inch pot with drainage holes and a mix of potting soil and perlite. Place containers in partial shade and water regularly—containers dry out faster. Dwarf varieties like ‘Lily of the Valley’ work best in pots.
Why aren’t my forget-me-nots flowering? What’s wrong?
Lack of blooms often signals too much sun (they prefer shade) or poor soil nutrients. Fertilize lightly in spring with balanced 10-10-10, and trim leggy stems to encourage bushier growth. Patience helps too—they may take 2–3 years to fully establish.
What are some forget-me-not alternatives for pollinators?
If you love forget-me-nots but want more pollinator-friendly options, try:
- Myosotis sylvatica (wood forget-me-not, self-seeds)
- Lobelia (compact, blue blooms, attracts bees)
- Speedwell (Veronica) (drought-tolerant, long bloom time)
Wrapping up and next steps
Adding perennial forget-me-nots to your garden is a rewarding choice—these delicate, cold-hardy blooms bring years of color with minimal effort! Their ability to self-seed and thrive in partial shade makes them a dream for both beginner and seasoned gardeners. 🌸
Ready to plant yours? Start by picking a spot with well-draining soil, then follow the care tips shared above. Before you know it, you’ll have a cottage-garden staple that blooms year after year—and spreads joy to pollinators! Happy planting! 🌱