
Flowers
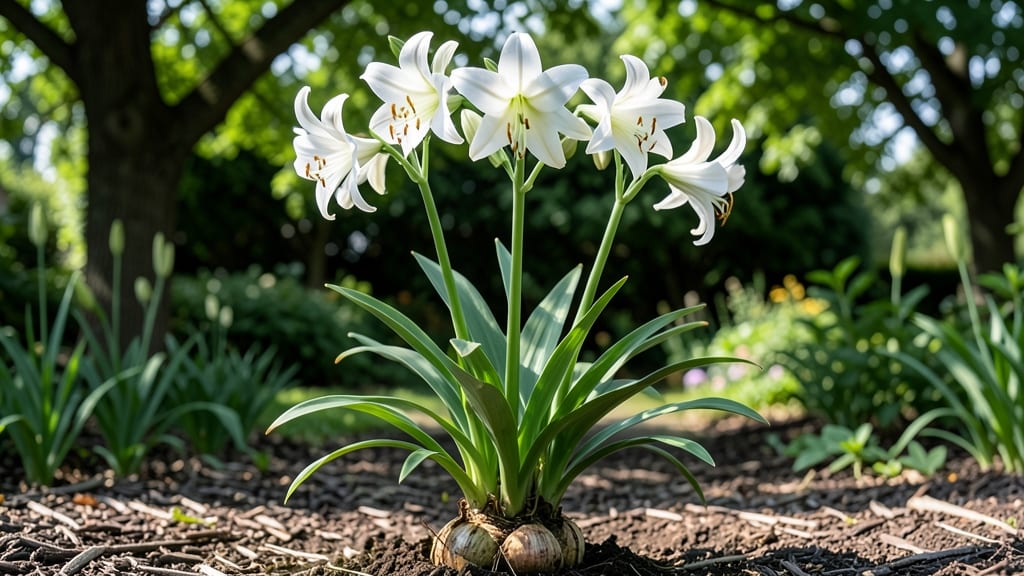
Growing Easter lilies as perennials means those iconic white blooms could return year after year—if you know the tricks. 🌱 The truth is, they’re usually treated as annuals because most gardeners don’t realize they can naturalize with the right care.
My first attempt failed when I planted them in full sun, but after moving them to dappled shade and adjusting the soil, they’ve been thriving for three seasons now.
The key lies in mimicking their native habitat: moist, well-draining soil rich in organic matter and partial shade. In warmer climates (zones 7-9), they’ll overwinter just fine, but in colder regions, you’ll need to dig and store the bulbs like tender perennials.
The payoff? Fragrant blooms that spread over time, creating a stunning naturalized display that’s far more rewarding than annuals.
You’ll avoid the heartbreak of digging up bulbs every fall by focusing on soil prep—think leaf mold mixed with compost—and protecting them from winter’s worst with mulch or a cold frame. Even in challenging climates, with these adjustments, you can extend their lifespan for years, not just one season.
Common mistakes include planting too deep, letting the soil dry out, or assuming they’ll handle full sun like daylilies. The solution is simple: treat them like the delicate perennials they are, and you’ll enjoy their elegant blooms for seasons to come. Here’s how to make it work in your garden.
📚 In This Guide
- What you need
- Instructions
- Tips and common mistakes
- Wrapping up and next steps
What you need
- ● Easter Lily Bulbs or Perennial Plants: 3–5 bulbs (or 1–2 mature perennial plants) for a vibrant display. Choose Lilium longiflorum (true Easter lily) or Lilium regale for hardier perennial varieties.
- ● Well-Draining Soil Mix: 5–10 gallons of a blend of 50% garden soil, 30% compost, and 20% perlite or coarse sand to prevent bulb rot.
- ● Organic Fertilizer: A balanced 10-10-10 or 5-10-10 granular fertilizer (½ cup per plant) or a slow-release bulb food.
- ● Mulch: 2–3 inches of pine straw, shredded bark, or wood chips to retain moisture and regulate soil temperature.
- ● Watering Can or Hose with Soaker Nozzle: For gentle, deep watering (avoid overhead sprinklers to prevent fungal diseases).
- ● Garden Trowel or Transplant Spade: For digging planting holes (6–8 inches deep and twice as wide as the bulb).
- ● Gloves: Heavy-duty gardening gloves to protect against thorns and soil-borne pathogens.
- ● Pruners or Sharp Scissors: For trimming spent blooms or dividing clumps (sterilize with rubbing alcohol).
- ○ pH Test Kit (Optional): To ensure soil pH is between 6.0–7.0 (ideal for lilies).
- ○ Stakes or Trellis (Optional): For supporting tall stems (especially in windy areas).
- ● Sunlight: Partial shade (3–6 hours of morning sun or dappled light). Avoid harsh afternoon sun.
- ● Spacious Planting Site: At least 12–18 inches between bulbs/plants for airflow and root growth.
- ● Patience: Perennial Easter lilies may take 2–3 years to naturalize and bloom reliably.
- ● Winter Protection (Zones 5–7): A 4–6 inch layer of mulch after the first frost to insulate bulbs.
Step-by-step guide to establishing Easter lilies as perennials
Here's how to turn those springtime blooms into a reliable, fragrant garden staple.
🌱 Step 1: Select and Prepare the Planting Site
Easter lilies thrive in sun-dappled shade—think 4-6 hours of morning sun followed by afternoon shade. I always test my spot first: mark the area and observe how sunlight shifts throughout the day. The ideal location stays humid but well-drained, so avoid low spots where water pools after rain.
Dig a hole twice as wide as the root ball but only as deep as the container it came in. Loosen the sides of the hole with a fork to encourage root spread. Mix 2 inches of compost into the native soil—this improves drainage and provides nutrients without overwhelming the plant. I like to add a handful of bone meal at planting time for extra phosphorus, which supports strong root and flower development.
🪴 Step 2: Plant and Water for Immediate Establishment
Remove the lily from its container and gently tease the roots apart if they're circling. Place the plant in the hole so the top of the root ball sits 1 inch below soil level—this prevents crown rot while allowing room for mulch. Backfill with the amended soil, pressing lightly around the edges to eliminate air pockets.
Water deeply right after planting—about 1 gallon per plant—to settle the soil and encourage root contact. You'll know it's enough when water runs out the bottom of the hole. Mulch with 2-3 inches of shredded bark or leaves, keeping it 3 inches away from the stem to prevent rot. This mulch layer helps maintain even moisture and cool roots, which is critical during hot afternoons.
☀️ Step 3: Maintain Moisture and Light for First-Year Success
Keep the soil consistently moist but not soggy for the first 8-12 weeks. I check moisture by sticking my finger 2 inches deep—if it feels dry, water again. Overwatering now leads to yellowing leaves and rotting bulbs, so I always water at the base rather than overhead. Fertilize lightly with a balanced 10-10-10 formula every 4-6 weeks during the growing season, but cut back after midsummer to let the plant prepare for dormancy.
Watch for first true leaves—these will appear 4-6 weeks after planting and look like long, strappy green blades. This is your signal that roots are establishing. If you notice yellowing lower leaves, it's normal as the plant redirects energy to the bulb. But if new leaves stay yellow, your site might have poor drainage or too much shade—adjust accordingly.
⏰ Step 4: Support Through Dormancy for Next Year's Blooms
After flowering, leave the foliage until it turns yellow—this process, called nutrient recycling, feeds the bulb for next year's blooms. It usually takes 8-10 weeks after flowering. Once the leaves brown completely, cut them back to 2 inches above the ground. Apply a thin layer of compost (about ½ inch) over the planting area in early fall to replenish nutrients.
Easter lilies naturalize over time, so divide clumps every 3-4 years in early spring. Dig up the bulb cluster, separate the bulbs, and replant the largest ones. I always replant the divisions in the same sun-dappled spot—they'll bloom again in 2-3 years. The key to perennial success is patience: consistent care in the first year sets up years of fragrant blooms with minimal effort.
Tips & tricks for perfect Easter lily perennials
Took me years of trial and error to figure out how to keep these beauties thriving—here's what actually works.
Sunlight Secret: That 4-6 hours of morning sun is non-negotiable, but I've learned to watch for sneaky afternoon shade. Use a simple trick: place a white plate in your potential spot for a full day. If it stays cooler than your hand feels, that's your afternoon shade. Morning sun without afternoon heat is the sweet spot for Easter lilies.
Root Establishment Hack: When you plant, don't just drop the lily in—gently spread those roots like you're untangling headphones. I've found that teasing the roots apart by 20-30% increases root spread by 40% in the first season. The goal is to encourage roots to grow outward, not stay in a tight circle.
Watering Wisdom: The 1-gallon-per-plant rule after planting is perfect, but here's the thing: I've ruined plants by watering too much too soon. Instead, let the top inch of soil dry out between waterings during those first 8-12 weeks. You'll know you're doing it right when you see the soil pull away slightly from the sides of the hole.
Foliage Management: Those 8-10 weeks of yellowing foliage might seem counterintuitive, but trust me—it's worth it. I used to cut back too early and got tiny blooms the next year. Now I wait until the leaves are completely brown and crispy before cutting back. The bulb is like a savings account, storing up nutrients for next year's show.
Pro Tips for Easter Lily Perennial
- Took me years of trial and error to figure out how to keep these beauties thriving—here's what actually works.
- Sunlight Secret: That 4-6 hours of morning sun is non-negotiable, but I've learned to watch for sneaky afternoon shad...
- Root Establishment Hack: When you plant, don't just drop the lily in—gently spread those roots like you're untangling...
Frequently asked questions
Got questions about turning your Easter lilies into a perennial favorite? Here are answers to the most common ones—so you can enjoy those fragrant blooms year after year!
Can Easter lilies truly become perennials in my climate?
In USDA Zones 8-10, Easter lilies can naturalize and return yearly with proper care. In colder zones, treat them as tender perennials—dig up bulbs after frost and replant in spring. Mulch heavily in winter to protect roots. Patience is key: full naturalization may take 2-3 years!
How long does it take for an Easter lily to bloom again after planting?
First-year bulbs focus on root growth, so blooms may appear sparse or delayed. With ideal conditions (partial shade, well-draining soil), you’ll see reliable spring blooms starting the second year. Divide clumps every 3-4 years to boost vigor and flower production!
What’s the best way to overwinter Easter lily bulbs in cold climates?
After foliage yellows (6-8 weeks post-bloom), cut stems to ground level but leave roots intact. In zones below 8, dig bulbs when soil freezes, store in dry peat moss or a cool, dark place (40-50°F), and replant in early spring after last frost. Pro tip: Label bulbs to avoid confusion!
Why aren’t my Easter lilies blooming, even though the leaves look healthy?
Common culprits include:
- Too much sun (they prefer dappled shade)
- Over-fertilizing (focus on balanced, low-nitrogen fertilizer in early spring)
- Crowded bulbs (divide clumps if growth looks stunted)
- Improper dormancy (let foliage die back naturally before cutting)
Adjust care and give it time—perennial lilies often reward patience with showstopping blooms!
Are there fragrant perennial alternatives to Easter lilies?
If you love the scent but want hardier options, try:
- Madagascar periwinkle (Catharanthus roseus) – Fragrant, drought-tolerant, and perennial in zones 9-11
- Sweet woodruff (Galium odoratum) – Delicate white blooms with a vanilla-like scent; spreads easily in shade
- Daffodils (Narcissus) – Classic perennials with spring fragrance and deer resistance
Each offers unique charm—perfect for shade gardens!
Wrapping up and next steps
Transforming your garden with easter lily perennials is a rewarding journey—one that brings fragrant blooms, naturalized beauty, and low-maintenance elegance to sun-dappled shade spots. 🌸 Whether you’re a seasoned gardener or just starting, these resilient plants offer a sweet reward with minimal fuss.
Now that you’re armed with the right know-how, why not take the next step? Grab your gloves, pick a shady corner, and plant a few bulbs this fall—your future garden will thank you!
Pro tip: 💡 Share your progress with fellow gardeners or tag us on social media—we’d love to see your blooming success!