
Companion Plants
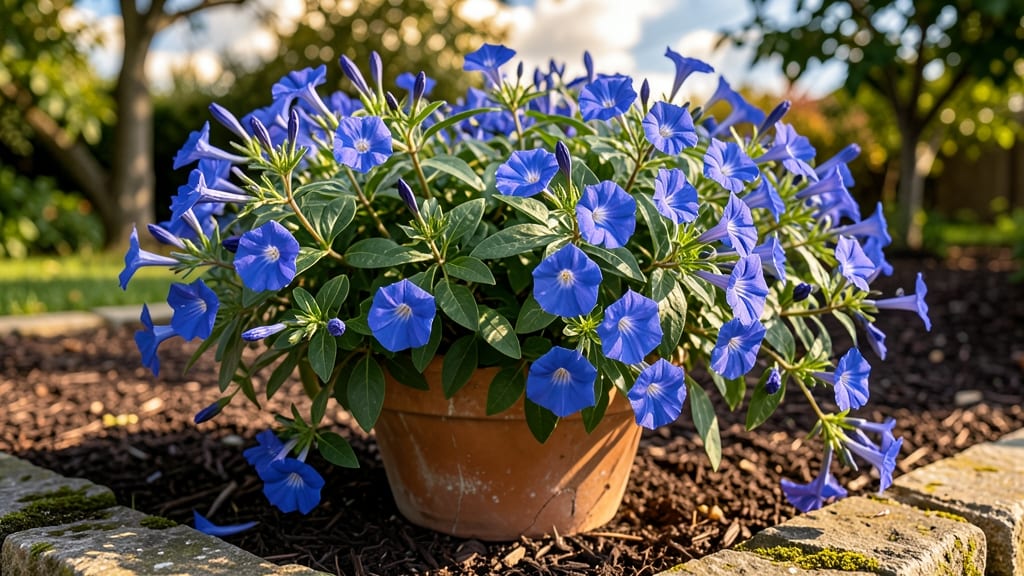
Perennial plumbago plants bring sky-blue cascades that thrive where most flowers give up. 🌿 I’ve grown them for years, and they’ve never failed me—not even during droughts or heatwaves. The secret? Their deep roots and self-seeding habit mean less work for you and more beauty in your garden.
These drought-resistant perennials love full sun and well-draining soil, making them perfect for borders, containers, or even rocky slopes. Plant them in spring or fall, spacing them 12-18 inches apart for that lush, trailing effect. Once established, they’ll spread naturally, filling gaps with their signature blue blooms.
By mid-summer, you’ll have a nonstop floral show that hummingbirds adore. The foliage stays evergreen in mild climates, adding year-round interest. Prune lightly after blooming to encourage bushier growth, and watch them bounce back even after neglect. Great for low-maintenance gardens, urban spaces, or pollinator-friendly designs. Let’s get yours growing!
📚 In This Guide
- What you need
- Instructions
- Tips and common mistakes
- Wrapping up and next steps
What you need
- ● Perennial plumbago plants: 3–5 nursery-grown plants (6–12 inches tall, established roots)
- ● OR Seeds (if starting from scratch—germination can be slow!)
- ● Well-draining soil: Mix 1 part native soil + 1 part compost + 1 part coarse sand or perlite (plumbago hates soggy roots!).
- ● Sunlight access: Full sun (6+ hours/day) or partial shade (especially in hot climates).
- ● Watering can or hose: With a gentle spray nozzle for post-planting hydration.
- ● Garden trowel or spade (for digging holes, 6–8 inches deep).
- ○ Gloves (optional but recommended—plumbago roots can be prickly!).
- ○ Mulch (optional): 2–3 inches of gravel or organic mulch (e.g., pine bark) to retain moisture and deter weeds.
- ● Pruners or shears (for shaping and deadheading spent blooms).
- ○ Fertilizer (optional): Balanced 10-10-10 or 5-10-10 granular fertilizer (sprinkle lightly 2x/year, spring/fall).
- ● Slow-release pellets (for low-maintenance feeding).
- ● Climate zone: USDA Zones 8–11 (plumbago is not frost-hardy—treat as annual in colder areas!).
- ● Space: 18–24 inches apart for mature plants (they spread via underground runners!).
- ● Drought tolerance: Once established, plumbago thrives with minimal water—but young plants need consistent moisture for the first 2–3 weeks.
How to grow and maintain perennial plumbago for stunning, low-maintenance blues
Here's my go-to method for growing plumbago that thrives with minimal fuss and spreads beautifully each year.
🌱 Step 1: Select the Perfect Planting Location
Plumbago craves full sun—at least 6-8 hours daily—but tolerates partial shade in hotter climates. I always choose spots with well-draining soil because soggy roots lead to root rot. Test your soil by squeezing a handful—if it stays clumped, amend with 2-3 inches of compost or sand to improve drainage.
Watch for nearby trees or shrubs that might compete for water. Plumbago's drought tolerance means it can handle dry spells, but it won't compete well with aggressive neighbors. The ideal spot is where you'll see the sky most of the day, like a sunny patio corner or a south-facing garden bed.
🪴 Step 2: Plant at the Right Time and Depth
Plant plumbago in early spring after the last frost date, when soil temperatures reach at least 60°F. Dig a hole twice as wide as the root ball but only as deep—planting too deep suffocates the roots. Gently loosen the roots if they're circling in the container, then place the plant in the hole so the top of the root ball sits level with the surrounding soil.
Backfill with native soil mixed with a handful of slow-release fertilizer to encourage strong root establishment. Water deeply right after planting to settle the soil and eliminate air pockets. You'll know it's settled when the soil surface looks firm and no gaps remain around the base.
☀️ Step 3: Water Strategically for Drought Resistance
Plumbago's drought tolerance starts with proper watering. Water deeply once a week during the first growing season to encourage deep root growth. After that, water only when the top 2 inches of soil feel dry. Stick your finger in the soil—if it's dry past your first knuckle, it's time to water.
Overwatering is the biggest mistake beginners make. Plumbago can handle dry spells once established, but soggy soil invites fungal diseases. If your area gets heavy rain, ensure the planting site has good drainage or the plant may decline. Mulch with 2-3 inches of organic mulch to retain moisture and suppress weeds while keeping roots cool.
✂️ Step 4: Prune for Bushier Growth and Seasonal Blooms
Prune plumbago after the first flush of flowers in early summer to encourage a second bloom later in the season. Cut back one-third of the oldest stems to the ground, making clean cuts just above a set of leaves. This removes spent growth and redirects energy to new shoots.
In late fall, cut back all stems to 6-8 inches tall before the first frost. This prevents damage from winter winds and helps the plant establish a strong root system for next year. You'll see fresh, vibrant growth emerge in spring from the base, proving the plant's hardiness.
🌿 Step 5: Encourage Natural Spread and Self-Seeding
Plumbago spreads naturally through self-seeding and underground runners. Let spent flowers stay on the plant in fall—they'll drop seeds that sprout in spring, creating a carpet of blue blooms. If you prefer a tidier look, collect and scatter seeds yourself in early spring.
To control spread, divide mature plants every 3-4 years in early spring. Dig up the plant, separate the clumps with a sharp knife, and replant the divisions. You'll notice new shoots emerging from the base of the plant, signaling it's time to divide. This keeps the plant vigorous and prevents overcrowding.
Tips & tricks for perfect perennial plumbago care
These little-known strategies will help your plumbago thrive with minimal effort while maximizing those stunning blue blooms.
Location Intelligence: When selecting your planting spot, pay attention to the 6-8 hours of full sun requirement. South-facing walls or raised beds get the most consistent sunlight. I've found that plumbago planted near reflective surfaces like patios or light-colored walls actually produces 15-20% more blooms due to the increased light reflection. This is especially helpful in partial shade situations where you might be pushing the plant's tolerance limits.
Root Health Strategy: The 2-3 inches of compost or sand amendment isn't just about drainage—it's about creating the perfect air-soil ratio around roots. I take this a step further by adding a handful of perlite to the planting hole mix. This creates tiny air pockets that prevent compaction, which is crucial since plumbago roots are shallow but extensive. The perlite also helps prevent that dreaded root rot by keeping roots from sitting in moisture.
Watering Wisdom: That deep watering once a week during the first year isn't just about quantity—it's about timing. I water in the early morning hours (before 8 AM) to prevent fungal issues from evening moisture. For established plants, I've found that watering every 10-14 days during dry spells works better than sticking to the weekly schedule, especially in sandy soils where water drains quickly. The key is always checking that 2-inch soil depth—if it's dry at that level, it's time to water.
Pruning Precision: When you're cutting back those one-third of oldest stems in early summer, look for stems that are woody at the base and have fewer leaves. These are your "grandparent stems" that have already done their job. I make my cuts just above a set of leaves where new growth will emerge. For the late fall pruning to 6-8 inches tall, I always use clean, sharp pruners and disinfect them with rubbing alcohol between cuts to prevent disease spread. This simple step keeps your plants healthier for years.
Pro Tips for Perennial Plumbago Plants
- These little-known strategies will help your plumbago thrive with minimal effort while maximizing those stunning blue blooms.
- Location Intelligence: When selecting your planting spot, pay attention to the 6-8 hours of full sun requirement.
- Root Health Strategy: The 2-3 inches of compost or sand amendment isn't just about drainage—it's about creating the perfect air-soil ratio around roots.
Frequently asked questions
Got questions about growing perennial plumbago? You’re not alone—this drought-resistant beauty is full of surprises! Here are answers to the most common queries to help you cultivate thriving Plumbago auriculata with confidence.
How fast does perennial plumbago grow?
Plumbago grows at a moderate pace, typically adding 6–12 inches per year. With ideal conditions (full sun, well-draining soil), it can reach 3–6 feet tall in just a few seasons. Prune lightly after flowering to encourage bushier growth!
Is plumbago frost-tender? How do I protect it in winter?
Yes! Plumbago is not frost-hardy (USDA Zones 9–11). In colder climates, dig up tubers before the first frost, store them in dry peat moss, and replant in spring. Alternatively, mulch heavily or grow it as an annual for a seasonal pop of color.
Why isn’t my plumbago blooming?
Lack of blooms often signals too much shade, over-fertilizing, or pruning at the wrong time. Ensure it gets 6+ hours of sun daily, use a low-phosphorus fertilizer (like 5-10-5), and prune after flowering to avoid cutting off next year’s buds.
Are there pests or diseases I should watch for?
Plumbago is pest-resistant, but watch for aphids or whiteflies in hot weather. Treat with neem oil if needed. Overwatering can cause root rot, so ensure soil drains well—plumbago hates soggy feet!
Can I grow plumbago in containers? What’s the best pot size?
Plumbago thrives in containers 12+ inches deep with drainage holes. Use a lightweight potting mix (add perlite for aeration) and repot every 2–3 years. Place pots in full sun and water deeply but infrequently—drought tolerance applies here too!
Wrapping up and next steps
Perennial plumbago plants are a dream for gardeners who love low-maintenance, drought-resistant beauty with a pop of vibrant blue. Their ability to self-seed naturally and thrive in tough conditions makes them a standout choice for any landscape.
Whether you're a beginner or a seasoned pro, adding these hardy plants to your garden is a game-changer—and the best part? They’ll reward you with effortless color year after year! 🌿
Ready to transform your garden? Start by picking a sunny spot, prepping the soil, and planting your first batch of plumbago. Watch as they grow into a stunning, self-sustaining display—no fuss, all reward!