
Flowers
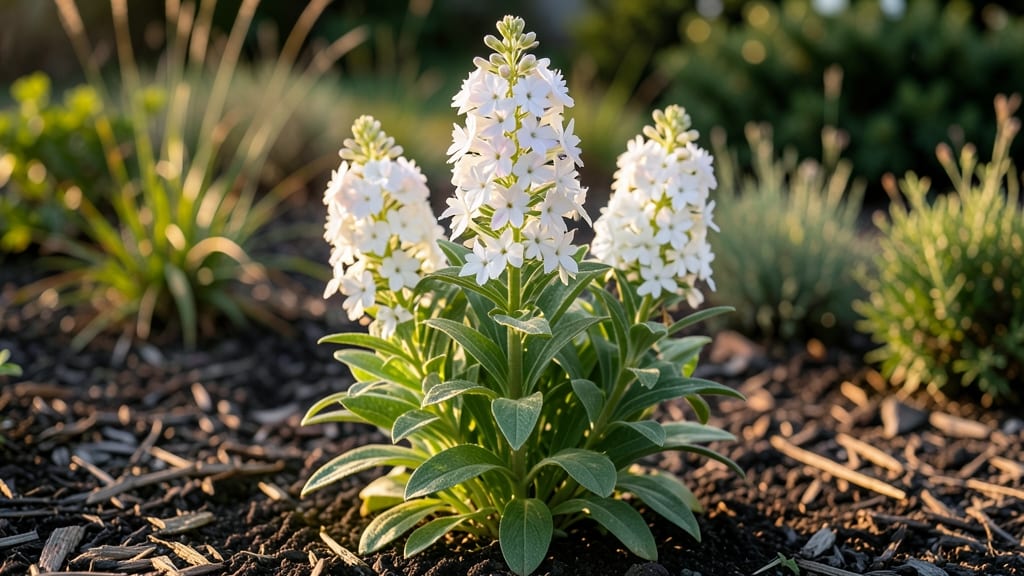
Growing perennial white phlox means waking up to clouds of fragrant blooms every summer without replanting. 🌸 I've learned the hard way that these cold-hardy beauties thrive when you mimic their wild meadow roots—moist but well-drained soil, full sun, and a little winter protection in harsh zones.
The key is patience: they take 2-3 years to reach their full, mildew-resistant glory, but once established, they multiply like wildfire and return year after year.
Start with a site that gets 6+ hours of direct sun and amend heavy clay with compost to prevent root rot. Water deeply once a week (more in extreme heat), keeping the soil consistently moist but never soggy.
After blooming, cut back stems by half to encourage next year's growth—this also improves airflow and reduces powdery mildew risk. My plants now spread aggressively, creating a fragrant white blanket that hummingbirds and bees adore.
📚 In This Guide
- What you need
- Instructions
- Tips and common mistakes
- Wrapping up and next steps
What you need
- ● Perennial white phlox plants: 3–5 mature plants (or 10–15 young starts) for a full, lush display. Choose Phlox paniculata varieties like ‘White Delight’ or ‘David’.
- ● Well-draining soil: Amend heavy clay or sandy soil with 2–3 inches of compost or peat moss to improve fertility and moisture retention.
- ● Organic fertilizer: A balanced, slow-release formula (e.g., 10-10-10) or a phosphorus-rich option (like bone meal) to encourage blooming.
- ● Mulch: 2–3 inches of shredded bark or pine straw to retain moisture and suppress weeds.
- ● Watering can or hose with a gentle spray nozzle: Phlox prefers consistent moisture but hates soggy roots.
- ● Garden gloves: To protect your hands while handling soil or plants.
- ● Pruners (sterilized): Sharp, clean pruners for trimming spent blooms or shaping plants.
- ● Garden trowel or spade: For digging planting holes (6–8 inches wide and deep).
- ○ Stakes or cages (optional): Tall varieties (like ‘Mount Fuji’) may need support as they grow 2–4 feet tall.
- ● Slow-release fertilizer spikes: Convenient for feeding without manual application.
- ○ Compost tea or liquid seaweed (optional): Boosts soil health and plant resilience.
- ○ Garden twine (optional):strong> For securing stakes to tall phlox stems.
- ○ Soil pH test kit (optional): White phlox thrives in slightly acidic to neutral soil (pH 6.0–7.0).
Step-by-step guide to planting and caring for perennial white phlox
Here's how to establish these cold-hardy beauties for years of effortless blooms.
🌱 Step 1: Choose the Perfect Planting Location
White phlox thrives in partial shade to full sun, but the key is morning sunlight and afternoon shade—especially in hotter climates. I always look for spots with 4-6 hours of morning sun and dappled shade after 10 AM. The soil should drain well but retain moisture, as soggy roots lead to rot.
Test your spot by digging a 6-inch hole. If water pools after 10 minutes, amend the soil with 2-3 inches of compost to improve drainage. Phlox also appreciates slightly acidic soil (pH 6.0-7.0), so a soil test kit helps confirm ideal conditions before planting.
🪴 Step 2: Plant Bare-Root or Container-Grown Phlox Correctly
For bare-root plants, soak the roots in lukewarm water for 1 hour before planting to revive them. Dig a hole twice as wide and just as deep as the root ball. Spread the roots gently outward in the hole—they’ll settle naturally, so don’t force them down. This prevents root stress and encourages strong growth.
If using container-grown phlox, remove it from the pot and loosen the root ball at the edges with your fingers. Place it in the hole so the top of the root ball sits 1 inch below soil level. Backfill with native soil mixed with 1 cup of compost per plant. Water deeply to eliminate air pockets and help roots make contact with the soil.
💧 Step 3: Water Deeply and Mulch for Retention
After planting, water each phlox 1-2 gallons per plant to settle the soil and encourage root growth. You’ll know it’s enough when water drains from the bottom of the hole. Over the next 2-3 weeks, water 2-3 times weekly to keep the soil evenly moist—not soggy. Phlox roots need consistent moisture to establish, especially in their first year.
Spread 2-3 inches of mulch (like shredded bark or pine needles) around the base, keeping it 2 inches away from the stem to prevent rot. Mulch locks in moisture and keeps roots cool during summer heat. Replenish mulch annually in early spring to maintain its protective layer.
☀️ Step 4: Prune and Fertilize for Long-Lasting Blooms
After flowering, cut back stems to half their height with clean pruners to encourage bushier growth next season. I always sterilize my pruners with rubbing alcohol first—this prevents spreading disease between cuts. Deadhead spent blooms throughout the season to redirect the plant’s energy into new flowers rather than seed production.
Feed phlox in early spring with a balanced, slow-release fertilizer (10-10-10) applied at half the recommended rate. Too much fertilizer leads to lush foliage but fewer blooms. Water lightly after fertilizing to help nutrients penetrate the soil. Repeat in midsummer if growth slows, but avoid fertilizing after early August—this encourages tender new growth that won’t survive winter.
⏰ Step 5: Prepare for Winter and Encourage Return Blooms
Phlox is cold-hardy, but a 3-inch layer of mulch in late fall protects roots from freezing and thawing cycles. I use straw or leaves because they break down slowly and add organic matter to the soil. In early spring, remove old mulch and add fresh compost to replenish nutrients before new growth appears.
Watch for new shoots in late winter—this is your cue that the plant is waking up. Once you see 2-3 inches of growth, it’s safe to trim back old stems completely. Phlox often blooms on old wood, so don’t rush pruning until you’re sure new growth has started. Patience here ensures bigger, more vibrant blooms next season.
Tips & tricks for perfect perennial white phlox planting
These practical tips will help you establish healthy, long-lasting white phlox that thrives year after year.
Location Insight: When evaluating morning sun exposure, pay attention to nearby structures or trees that might cast shade later in the day. I've learned that even small changes in location can affect bloom quality—phlox planted in full afternoon sun often produces less vibrant flowers. The 4-6 hours of morning sun is non-negotiable for that classic phlox abundance.
Root Revival Technique: For bare-root plants, don't just dip the roots in water—give them that full 1-hour soak in lukewarm water. This isn't just about hydration; it helps revive dormant roots and jumpstarts growth. I've seen plants that get this treatment establish roots twice as quickly compared to those given a quick rinse.
Watering Wisdom: The 2-3 gallons per plant initial watering might seem excessive, but it's crucial for eliminating air pockets around the roots. After planting, I press the soil gently with my hands to ensure good contact—this simple step can prevent root rot by improving drainage. Remember, phlox roots need consistent moisture but hate soggy conditions.
Mulch Mastery: Keeping mulch 2 inches away from the stem prevents rot while still protecting roots. I've noticed that mulch piled against stems creates a damp environment that invites fungal issues. For extra protection during winter, add that 3-inch layer of straw—it breaks down slowly and adds organic matter as it decomposes.
Pro Tips for Perennial White Phlox
- These practical tips will help you establish healthy, long-lasting white phlox that thrives year after year.
- Location Insight: When evaluating morning sun exposure, pay attention to nearby structures or trees that might cast shade later in the day.
- Root Revival Technique: For bare-root plants, don't just dip the roots in water—give them that full 1-hour soak in lukewarm water.
Frequently asked questions
How do I keep my white phlox blooming all season?
Prune back leggy stems after the first flush of blooms to encourage a second round. Deadhead spent flowers regularly, and fertilize lightly with a balanced, slow-release formula in early spring. Pro tip: Mulch around the base to retain moisture and deter weeds, which can stress the plant.
Is white phlox truly cold-hardy? What zones does it thrive in?
Yes! Perennial white phlox is tough as nails and thrives in USDA Zones 3–8. It handles frost like a champ and often blooms early in spring, sometimes even through light snow. Just plant it in a spot with full sun to partial shade for best results.
Why are my phlox leaves turning yellow or spotted?
Yellowing leaves often signal overwatering or fungal issues. Improve airflow by spacing plants 18–24 inches apart, water at the base (not overhead), and avoid wet foliage. For mildew, apply a fungicide or mix baking soda with water (1 tsp per quart) as a preventive spray.
Can I grow white phlox in containers? What’s the best setup?
Use a well-draining potting mix with added compost, and choose a container at least 12 inches deep with drainage holes. Place it in a spot with morning sun and afternoon shade to prevent wilting. Repot every 2–3 years to refresh the soil.
What are some great alternatives if I want similar flowers but with less maintenance?
Try Shasta daisies (long-blooming and drought-tolerant), catmint (drought-resistant and deer-resistant), or Russian sage (tough, fragrant, and thrives in heat). For a milder look, Japanese anemones offer delicate blooms with minimal fuss.
Wrapping up and next steps
Growing perennial white phlox is a rewarding journey that brings beauty and resilience to your garden year after year! 🌸 With the right care—sunlight, well-draining soil, and occasional pruning—you’ll enjoy fragrant blooms that thrive even in colder climates.
Whether you’re a beginner or seasoned gardener, these cold-hardy plants are perfect for adding elegance and charm to your outdoor space.
Ready to transform your garden? Start by choosing the right spot and follow the steps above to nurture your phlox into a stunning, long-lasting centerpiece. Happy planting! 🌱