
Plants
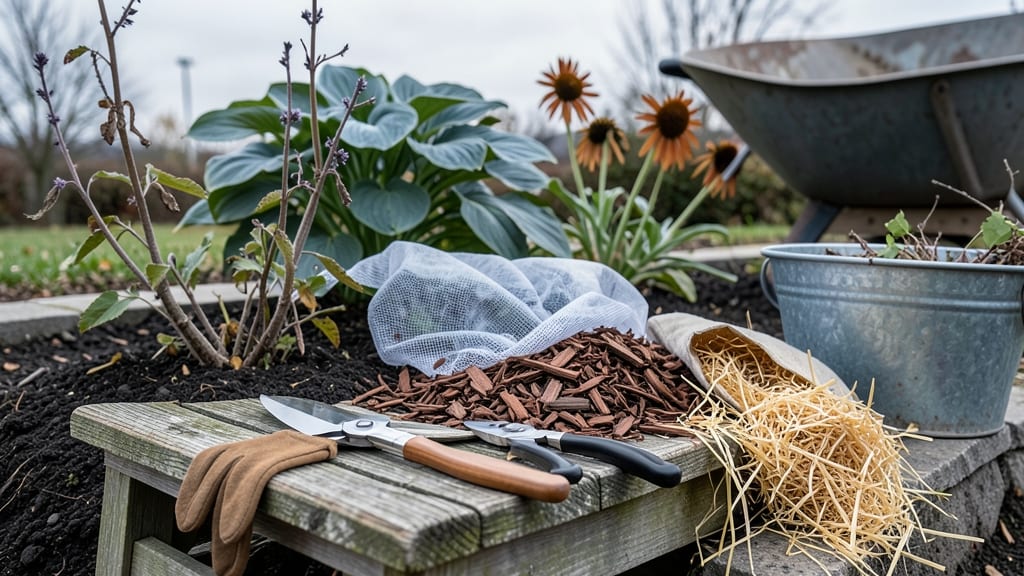
Preparing perennials for winter isn't just about cutting back—it's about giving them the best shot at surviving the cold months. ✨ Last year, my hostas and coneflowers nearly died from a harsh freeze because I rushed the process, but this year, I'm sharing the exact steps that saved my plants and kept them thriving through Zone 5 winters.
The key is timing, protection, and knowing which perennials need extra care. You'll need sharp pruners, a thick layer of mulch, and maybe some frost blankets for sensitive varieties.
Start by cutting back dead foliage in late fall, but leave the stems of early bloomers like hellebores—they'll protect next year's buds.
By spring, you'll see plants bursting from the ground with stronger roots and more vibrant blooms because they weren't stressed by winter. The mulch insulates the soil, frost blankets shield tender stems, and proper pruning prevents disease. It’s the difference between a garden that recovers and one that struggles.
Works for all zones—just adjust timing and materials based on your climate. Whether you're in a cold northern zone or a mild southern one, these steps keep perennials healthy year after year. Let’s get your garden ready!
📚 In This Guide
- What you need
- Instructions
- Tips and common mistakes
- Wrapping up and next steps
What you need
- ● Pruners or shears: Sharp, clean pair (bypass pruners work best) – 1-2 sets.
- ● Garden gloves: Heavy-duty, waterproof (to protect hands from thorns and cold).
- ● Mulch: Organic (straw, shredded leaves, or pine needles) or inorganic (landscape fabric) – 2-4 inches depth.
- ● Garden fork or trowel: For aerating soil or lifting plants if needed.
- ● Watering can or hose: For final hydration before winter (if needed).
- ● Plant tags or markers: To label perennials for easy identification in spring.
- ● Frost cloth or burlap: For added protection in harsh climates (Zone 3-5).
- ○ Compost or slow-release fertilizer: Light application before mulching (optional in fall).
- ● Plant supports (stakes, cages): For heavy mulch or snow loads.
- ● Thermometer: To monitor soil temps in cold zones (Zone 6 and below).
- ● Wheelbarrow or bucket: For hauling mulch or debris.
Step-by-Step instructions for winterizing perennials
Here's my zone-tested method to keep perennials thriving through frost and snow.
☀️ Step 1: Assess Plant Health and Cut Back Properly
Start by examining each plant for signs of pests, disease, or dead foliage. I always begin cutting back in late fall—about 4-6 weeks before your first hard frost. For most perennials, trim back dead or diseased leaves to about 2-3 inches above the ground. This prevents pests from overwintering in the debris while leaving enough foliage to protect the crown.
For woody perennials like lavender or Russian sage, I cut back harder—about half their height—since they store energy in their stems. Watch for new growth or buds at the base; these are your signal that the plant is still alive and worth protecting. If you see no signs of life, it might be time to replace that perennial entirely.
💧 Step 2: Water Deeply and Gradually Reduce Frequency
About 2 weeks before the first frost, give your perennials a deep, thorough watering. This encourages roots to grow deeper into the soil, making them more resilient to winter drought. I water early in the day so the soil has time to absorb moisture before evening. After this, taper off watering—perennials go dormant when the ground freezes, so you don’t want soggy soil inviting rot.
Check soil moisture by digging down 2-3 inches—if it feels dry, give a light drink. If it’s damp, hold off. Overwatering now is a common mistake; dry but not frozen soil is ideal for winter survival. Mulch will help retain what little moisture remains, but don’t add it until after the ground freezes.
🪴 Step 3: Apply Protective Mulch Layer
Once the ground is firmly frozen (usually after the first hard frost), spread 3-4 inches of organic mulch—like shredded leaves, straw, or wood chips—around the base of your perennials. I always pull mulch away slightly from the crown to prevent rot. This layer acts like a blanket, insulating roots from extreme cold while allowing them to breathe.
For tender perennials in zones 5-7, add an extra 2-3 inches of mulch or cover with burlap or frost cloth if temperatures dip below 10°F. In colder zones (3-4), consider piling mulch higher or using straw bales around sensitive plants like peonies or hostas. Check mulch levels after heavy snowfall—pile snow away to avoid suffocating the plants.
⏰ Step 4: Protect Crowns and Delicate Stems
For perennials with tender crowns (like daylilies or cannas), mound extra soil or mulch around the base to shield them from freezing. I often bend stems downward and secure them with u-shaped stakes or bricks, then cover with a thick layer of leaves or straw. This prevents wind damage and keeps the plant’s energy focused on root survival.
If you’re in a windy area, consider wrapping sensitive plants in burlap or frost cloth to prevent desiccation. Avoid plastic—it traps moisture and can cause rot. In zones 8-10, where frosts are mild but brief, you might only need to remove dead foliage and let nature take its course. The key is preventing moisture buildup while insulating against cold snaps.
🌱 Step 5: Monitor and Adjust Through Winter
Check your perennials once a month during winter, especially after thaws or heavy snow. Shovel snow away from heavily mulched areas to prevent compaction. If you notice mold or wet spots, fluff the mulch or add more dry leaves to improve airflow. In extreme cold snaps (below 0°F), cover bare soil around plants with a light layer of straw for extra protection.
Come early spring, remove mulch gradually—about 2-3 weeks before your last frost—to let soil warm naturally. This prevents sudden temperature shocks to emerging shoots. Watch for new growth as your first sign that winter prep worked. If you see yellowing leaves or stunted growth, it might mean over-mulching or poor drainage—adjust next year’s approach accordingly.
Tips & tricks for perfectly winterized perennials
Winterizing your perennials isn't just about survival—it's about setting them up for a stronger spring comeback. Here's what I've learned after years of trial and error in my own garden.
Timing is Everything: That 4-6 week window before your first hard frost is critical for Step 1. If you cut back too early, your plants might regrow before winter, only to get damaged by late frosts. I always check my local frost date calendar and mark the cutoff on my garden planner. For zones 3-4, start even earlier—those plants need extra time to harden off.
Mulch Like a Pro: When applying your 3-4 inch mulch layer in Step 3, don't just pile it randomly. Create a slight depression around the crown to prevent water pooling. I use a flat shovel to gently carve out a shallow well before adding mulch. For tender perennials in zones 5-7, I double up by adding a layer of straw over the mulch when temperatures drop below 10°F—this creates an extra insulating barrier without suffocating the plants.
Zone-Specific Adjustments: The instructions mention zones 3-10, but here's the real secret: pay attention to microclimates within your garden. A south-facing bed warms up faster than a north-facing one. In my zone 6 garden, I've found that peonies on the south side only need standard mulch, while those on the north side get the extra straw treatment. Always err on the side of extra protection if your plants are in a colder microclimate.
Spring Transition Tip: When you're ready to remove mulch in early spring (Step 5), don't pull it all off at once. I remove about half first, then wait a week before removing the rest. This gradual exposure helps prevent shock to emerging shoots. Watch for new growth—when you see those first tender leaves, that's your signal to finish removing mulch completely.
Pro Tips for Prepare Perennials For Winter
- Winterizing your perennials isn't just about survival—it's about setting them up for a stronger spring comeback.
- Timing is Everything: That 4-6 week window before your first hard frost is critical for Step 1.
- Mulch Like a Pro: When applying your 3-4 inch mulch layer in Step 3, don't just pile it randomly.
Frequently asked questions
Got questions about winterizing your perennials? You’re not alone! Here are answers to the most common concerns—plus a few pro tips to keep your plants thriving next season.
When is the best time to prepare perennials for winter?
The ideal time depends on your USDA Hardiness Zone, but generally, start 4-6 weeks before the first hard frost (usually late fall). In colder zones (5-8), aim for October-November. In milder zones (9-10), wait until December or even early January. Key sign: Stop fertilizing and let foliage die back naturally.
Do I really need to cut back perennials before winter?
Not always! Deadheading (removing spent blooms) is enough for hardy perennials like coneflowers or black-eyed Susans, but cut back tender varieties (e.g., hostas, canna lilies) to 2-3 inches above soil. Pro tip: Leave seed heads for winter interest—birds love them!
What’s the easiest way to protect perennials from freezing?
For first-time freezes, a thick layer of mulch (4-6 inches of straw, leaves, or shredded bark) is your best friend. For tender perennials (like lavender or rosemary), wrap them in burlap or use frost cloth. Bonus: Group plants together to create a "micro-climate" that traps heat.
Can I skip winter prep if my perennials survived last year?
Even if your plants look fine, consistent winter prep extends their lifespan. Last year’s survival doesn’t guarantee next year’s—soil moisture, pests, and unexpected cold snaps can still harm them. Quick fix: At minimum, mulch and water deeply before frost. Prevention is easier than cleanup!
What do I do if my perennials show damage after winter?
Don’t panic! Brown stems = often just dormant. Wait until spring (when new growth appears) to prune dead foliage. If mold or rot is visible, remove affected parts and re-mulch with fresh, dry material. Overwatering in winter is a common culprit—let soil dry between rains!
Still stumped? Check out our zone-specific checklist for tailored advice!
Wrapping up and next steps
Preparing your perennials for winter is all about timing, care, and a little extra love—and you’ve got this! 🌱 With the right techniques tailored to your hardiness zone, you’ll help your plants thrive come spring.
Start by assessing your garden, gathering supplies, and following the steps we’ve shared to protect roots, mulch wisely, and provide shelter when needed.
Now that you’re armed with knowledge, take action! Grab your gloves, check your local forecast, and give your perennials the winter prep they deserve. Before you know it, your garden will be bursting with life again—and you’ll be the hero behind it.