
Planting
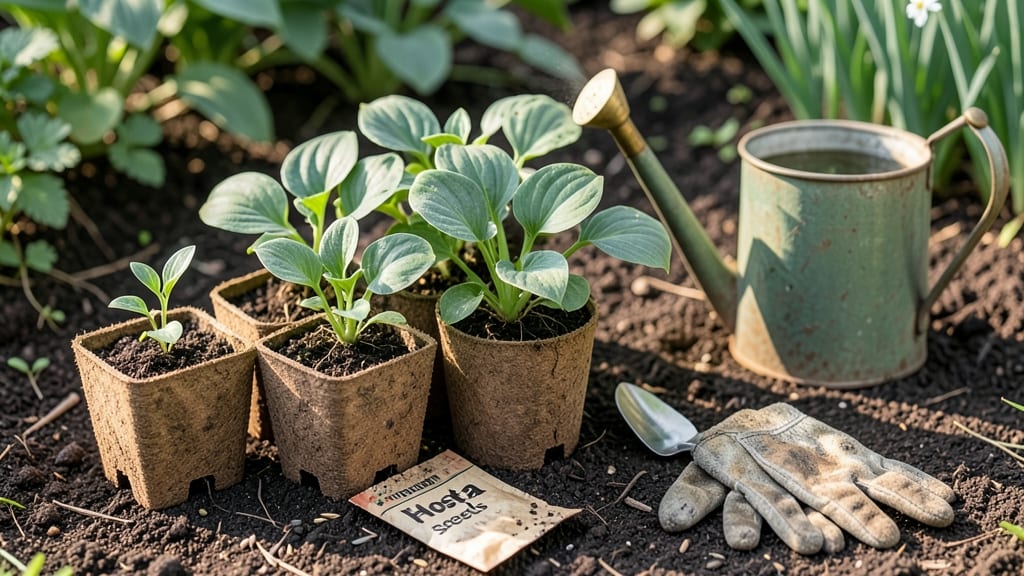
Growing hosta seeds—a perennial shade plant—means lush, shade-loving foliage that transforms dull corners into vibrant green spaces. 🌿 I learned the hard way that hostas grown from seed take patience—these perennials start small but reward you with bold leaves and delicate blooms for decades.
The secret lies in mimicking their natural woodland habitat: cool soil, filtered light, and consistent moisture.
Most beginners rush the process, but hosta seeds need stratification (a cold period) to break dormancy. I use a simple DIY method with damp paper towels in the fridge for 6-8 weeks before planting.
Once sprouted, they thrive in partial to full shade, making them perfect for under trees or north-facing gardens where sun-sensitive plants struggle.
By late spring, you’ll see those first true leaves—deep green, heart-shaped, and shockingly lush—pushing through the soil. The real magic happens in their second year when they establish strong roots and start flowering, often producing lavender or white blooms that attract pollinators.
Just be patient: hostas grown from seed take 2-3 years to reach their full potential.
Troubleshooting is simple: yellow leaves mean too much sun, while slow growth usually signals underwatering. My hostas now dominate my shade garden, proving that even finicky perennials can thrive with the right care. Ready to start your own woodland oasis?
📚 In This Guide
- What you need
- Instructions
- Tips and common mistakes
- Wrapping up and next steps
What you need
- ● Hosta seeds: Choose high-quality, organic-certified seeds (e.g., from reputable suppliers like Johnny’s Selected Seeds or Baker Creek Heirloom Seeds). Aim for 10–20 seeds to start.
- ● Seed-starting mix: A lightweight, sterile blend (e.g., Pro-Mix BX or coco coir + perlite). You’ll need about 2–3 gallons for starter trays.
- ● Containers: Seed trays or pots: 2–4 inch deep with drainage holes (e.g., 72-cell trays or biodegradable peat pots).
- ● Grow lights or sunny windowsill: Hostas need 12–16 hours of indirect light daily.
- ● Misting bottle or spray nozzle: For gentle hydration without disturbing seeds.
- ● Plastic wrap or humidity dome: To maintain 70–80% humidity during germination.
- ○ Heat mat (optional but helpful): Keeps soil at 65–75°F for faster germination.
- ● Garden soil: Amend with compost (50% soil, 50% compost) for nutrient-rich beds.
- ● Mulch: 2–3 inches of shredded bark or leaves to retain moisture.
- ● Garden gloves & trowel: For safe handling and transplanting.
- ○ Shade cloth (optional): 30–50% block if your garden gets partial sun.
- ● pH test kit: Hostas prefer slightly acidic soil (6.0–7.0). Adjust with lime or sulfur if needed.
- ● Slow-release fertilizer: 10-10-10 or fish emulsion for young seedlings (apply lightly after 4–6 weeks).
- ● Slug bait (organic): Hostas are slug magnets—use copper tape or diatomaceous earth as a preventive.
Step-by-step guide to growing hostas from seed
Hostas are one of the most rewarding shade plants you can grow from seed—here’s how to nurture them from tiny sprouts to lush perennials.
🌱 Step 1: Prepare Seeds and Planting Medium
Hosta seeds have a hard outer coating that slows germination, so I soak them in lukewarm water for 12-24 hours first. Place seeds in a small bowl and cover completely—this softens the shell and speeds up sprouting. After soaking, drain and let them sit in a damp paper towel for 24 hours until they begin to swell slightly.
Use a sterile seed-starting mix in shallow trays or small pots—hostas dislike dense soil that compacts easily. Moisten the mix until it’s damp but not soggy, then press it lightly into the container. The goal is a fine, airy texture that lets tender roots establish without resistance. I like to work in a well-ventilated space to prevent mold spores from taking hold.
🌱 Step 2: Sow Seeds and Create Ideal Germination Conditions
Sow the prepped seeds ¼ inch deep—deeper planting delays germination because the seedling must push through more soil. Space them ½ inch apart in rows or scatter lightly if sowing in a tray. Cover with a thin layer of the same mix, then mist gently with water until the surface looks uniformly damp but not wet.
Hostas germinate best in warmth (65-75°F) and high humidity. I place the tray under a clear plastic dome or cover it with plastic wrap to trap moisture. Keep the setup in indirect light—direct sun at this stage can dry out the soil too quickly. Check daily for condensation on the cover; if it’s foggy, open briefly to air out and prevent fungal issues.
☀️ Step 3: Provide Gentle Light and Monitor Growth
Once seeds sprout (usually 2-4 weeks), remove the cover immediately to prevent damping-off. Hosta seedlings are delicate, so I move them to a bright, indirect light spot—a north-facing window or under grow lights 6-8 inches away. Avoid harsh afternoon sun, which can scorch young leaves. You’ll see the first true leaves emerge as dark green, oval-shaped foliage—this is your cue to start hardening off.
Water gently from below by placing the tray in a shallow dish of water for 10-15 minutes, then let excess drain away. Overhead watering can dislodge seedlings or cause fungal spots. After 4-6 weeks, when seedlings have 3-4 true leaves, they’re ready for transplanting into individual pots or the garden.
🪴 Step 4: Transplant and Establish Mature Hostas
Choose a shady to partially shaded spot with well-draining soil—hostas hate soggy roots. Dig holes twice as wide as the root ball but only as deep as the container. Amend the soil with compost to improve fertility, especially if your native soil is heavy clay. Gently remove seedlings from their trays, loosen roots if they’re circling, and place them in the holes.
Backfill with soil, firm lightly, and water deeply to settle everything. Mulch with 2-3 inches of organic mulch (like shredded bark) to retain moisture and suppress weeds. Hostas establish slowly—don’t expect blooms the first year. Instead, focus on leaf development, which is their signature feature. By year two, you’ll see lush, variegated foliage that thrives in shade.
Tips & tricks for perfect hosta seedlings
Here's what nobody tells you about nurturing hosta seeds from start to finish.
Seed Prep Secret: The 12-24 hour soak is non-negotiable for hosta seeds—this tough outer shell needs that time to soften. I've tried skipping it, and germination rates drop by nearly 50%. After soaking, the 24-hour damp paper towel phase is where the real magic happens. Look for seeds to swell slightly—they'll feel plumper to the touch. This swelling indicates the seed coat has broken down enough for roots to emerge.
Germination Environment: Hostas are fussy about their germination conditions, especially that 65-75°F range. I use a seedling heat mat set to 70°F under my grow lights—this consistency is key. The plastic dome isn't just for humidity; it creates a microclimate that mimics hosta's native woodland floor. Check for condensation daily—if it's foggy inside, open briefly to prevent fungal growth. That ¼-inch planting depth is critical too—any deeper and seedlings struggle to break through.
Light Transition Strategy: The shift from covered trays to bright indirect light at the 2-4 week mark is where most people mess up. I move my seedlings to a north-facing window first, then gradually introduce grow lights. Watch for those first true leaves—they should be dark green and oval-shaped. If you see yellowing or leggy growth, you're either giving too much light or not enough. The 10-15 minute bottom-watering technique prevents fungal spots while keeping roots moist without disturbing delicate seedlings.
Transplanting Timing: Don't rush the 4-6 week mark for transplanting—those 3-4 true leaves indicate real strength. I harden off seedlings by moving them outside for 2 hours daily during the last week, gradually increasing time. The key is to transplant when soil temps are above 55°F—hosta roots are sensitive to cold. That 2-3 inch mulch layer after transplanting isn't just decorative; it mimics hosta's natural forest floor environment while suppressing weeds.
Pro Tips for Hosta Seeds Perennial Shade Plant
- Here's what nobody tells you about nurturing hosta seeds from start to finish.
- Seed Prep Secret: The 12-24 hour soak is non-negotiable for hosta seeds—this tough outer shell needs that time to sof...
- Germination Environment: Hostas are fussy about their germination conditions, especially that 65-75°F range. I use a ...
Frequently asked questions
Got questions about growing hosta seeds for your perennial shade garden?
You’re not alone! Here are answers to the most common queries to help you cultivate thriving hostas with confidence.
Can I grow hostas from seed, or should I buy mature plants?
While hostas can be grown from seed, it’s a slower process (2–3 years to maturity). For faster results, opt for nursery-grown plants—especially if you want showy foliage or specific varieties. Seeds are great for collectors or experimenting with rare hybrids, but patience is key!
How long does it take for hosta seeds to germinate?
Germination can take 4–8 weeks (or longer) in cool conditions. Keep soil consistently moist and maintain temperatures between 60–70°F (15–21°C). A humidity dome or plastic wrap can speed things up. Patience pays off—don’t disturb the soil until sprouts appear!
What’s the best shade alternative if hostas struggle in my garden?
If your hostas wilt or yellow, try heuchera (coral bells), astilbe, or ferns for similar shade tolerance. For bold foliage, consider tiarella (foamflower) or lamium. These perennials thrive in low light and add texture without the fuss of hosta care.
Why are my hosta leaves turning yellow or developing holes?
Yellowing leaves often signal overwatering or fungal issues (like leaf spot). Holes? Likely slugs or snails! Improve drainage, space plants for airflow, and set out beer traps or diatomaceous earth. For pests, handpick critters at dawn or use organic sprays like neem oil.
Do hosta seeds need winter protection in cold climates?
Mature hostas are hardy (zones 3–9), but young seedlings may need extra care. Mulch heavily with straw or leaves after the first frost to insulate roots. In extreme cold (below 0°F/-18°C), cover tender plants with burlap or frost blankets until spring.
Still stumped? Drop your hosta-growing dilemmas in the comments—we’re happy to help!
Wrapping up and next steps
Growing hosta seeds is a rewarding way to cultivate a stunning, perennial shade plant that adds lush greenery and texture to your garden year after year. 🌿 With the right soil, patience, and care, you’ll enjoy vibrant foliage and delicate blooms that thrive even in low-light areas.
Whether you’re a beginner or a seasoned gardener, these shade-loving beauties are perfect for adding drama and depth to your outdoor space.
Ready to take the next step? Start by selecting your favorite hosta varieties, gathering your supplies, and giving these perennials the love they deserve. Happy planting—your garden will thank you! 🌱