
Flowers
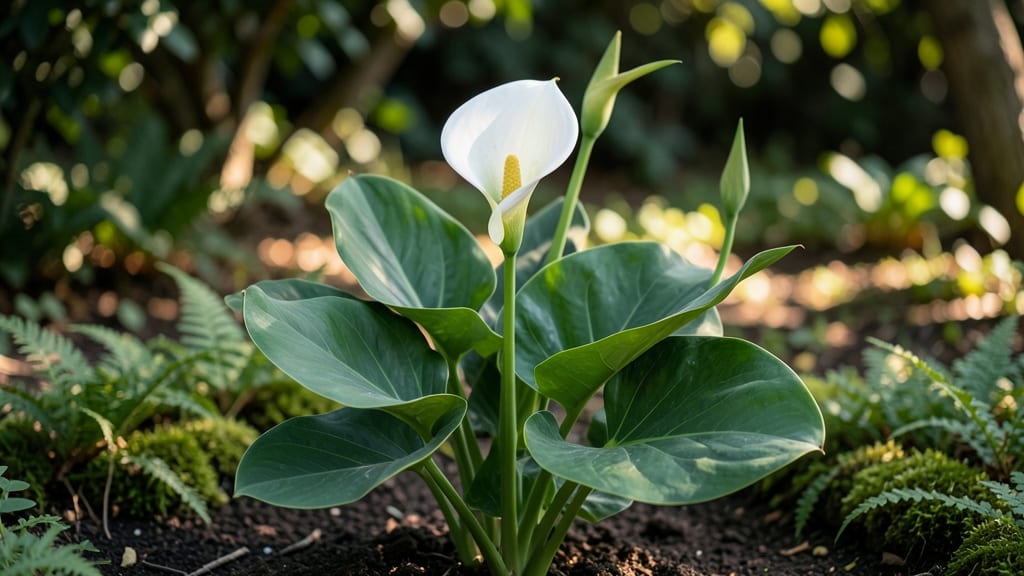
Growing calla lilies as perennials means bold, tropical-looking blooms that return every year with the right care. 🌿 I learned the hard way that treating them like annuals leads to disappointment—these plants can survive winter in the right zones, and the secret lies in soil, sunlight, and timing.
The first time I saw their dark, dramatic blooms push through spring soil, I knew I’d never go back to digging up tubers each fall.
Start with well-draining soil rich in organic matter—think compost or peat moss mixed into your garden bed—and plant in full sun to partial shade. Most gardeners overlook the importance of winter mulch in zones 7-9, where the roots need protection but not suffocation.
I’ve found that a 4-inch layer of straw after the first frost keeps them thriving, while too much mulch can rot the tubers. Watering is simple: keep the soil consistently moist but never soggy, especially during their active growing season.
By late summer, you’ll see those signature trumpet-shaped blooms emerging, and with proper care, they’ll keep producing until frost. The key to long-term success is not cutting back foliage until it yellows—this feeds the tuber for next year’s growth.
I’ve had plants return stronger after winter simply by leaving the dead stems in place until spring. Even in colder zones, with a little extra mulch and patience, you can enjoy these stunning perennials year after year.
For those in zones 5-6, treat them as tender perennials: dig up tubers before frost and store them in dry peat moss until spring. The trade-off? More work, but the payoff is worth it—imagine months of drama-free blooms without the annual replanting hassle.
Whether you’re a beginner or a seasoned gardener, calla lilies reward attention with show-stopping color that lasts all summer long.
📚 In This Guide
- What you need
- Instructions
- Tips and common mistakes
- Wrapping up and next steps
What you need
- ● Calla Lily Bulbs (Rhizomes): 10–20 bulbs (depending on desired coverage; spacing ~12–18 inches apart).
- ● Choose cold-hardy varieties like Zantedeschia aethiopica (tolerates zones 8–11).
- ● Well-Draining Soil: 1–2 bags of organic compost or peat moss (per 10 sq. ft. of bed).
- ○ Optional: Perlite or sand (for sandy soils, 1 part perlite to 3 parts soil).
- ● Garden Tools: Trowel or hand shovel.
- ● Garden fork (for loosening heavy clay soil).
- ● Pruners (for trimming dead foliage in fall).
- ● Mulch: 2–3 inches of shredded bark, straw, or pine needles (to retain moisture and insulate roots).
- ● Watering Can or Hose: With a gentle spray nozzle (calla lilies hate soggy roots!).
- ● Slow-release fertilizer (e.g., 10-10-10, 1 tbsp per plant at planting time).
- ● Container pots (12–18 inches deep, with drainage holes for patio gardening).
- ● Plant labels (to track varieties and care notes).
- ● Frost cloth (for tender varieties in zones below 8).
- ● Soil pH tester (ideal range: 6.5–7.0; amend with lime or sulfur if needed).
Step-by-step guide to planting and maintaining cold-hardy calla lilies
Here's how to establish calla lilies for long-term beauty—these perennials reward patience with bold foliage and striking blooms.
🪴 Step 1: Select the Perfect Planting Location
Calla lilies thrive in partial shade with morning sun and afternoon shade—this prevents leaf scorch while ensuring enough light for strong blooms. Choose a spot with well-draining soil and 6+ hours of filtered sunlight daily. I always test drainage by digging a 1-foot hole and filling it with water; if it drains in under an hour, the site is ideal.
These perennials dislike soggy roots, so avoid low-lying areas where water pools after rain. Amend heavy clay soil with 2-3 inches of compost to improve aeration. The ideal planting depth is 1 inch below the soil line—any deeper risks rotting the rhizomes, while planting too shallow exposes them to temperature swings.
🌱 Step 2: Prepare Soil and Plant Rhizomes Correctly
Loosen the soil to a depth of 12 inches with a garden fork to encourage root penetration. Work in 2-3 inches of organic matter like compost or well-rotted manure to provide nutrients without overwhelming the plant. Callas prefer slightly acidic to neutral soil (pH 6.0-7.0), so test your soil and adjust with sulfur or lime if needed.
Plant rhizomes 1-2 inches deep, spacing them 12-18 inches apart for mature plants. Orient them horizontally with the eyes (growth points) facing upward—this ensures they emerge properly. Water deeply after planting to settle the soil and eliminate air pockets around the rhizomes.
☀️ Step 3: Water and Fertilize for Establishment
Keep the soil consistently moist but not waterlogged for the first 4-6 weeks after planting. You'll know moisture is right when the top 2 inches of soil feel damp but not saturated. Overwatering causes rhizome rot, while underwatering stresses new growth. Mulch with 2-3 inches of organic mulch to retain moisture and regulate soil temperature.
Feed calla lilies with a balanced, slow-release fertilizer (10-10-10) at planting time, then again in early spring. Avoid high-nitrogen fertilizers—they promote leafy growth at the expense of blooms. I use a low-nitrogen, bloom-boosting formula (5-10-10) in late spring to encourage vibrant flowers.
✂️ Step 4: Prune and Divide for Long-Term Health
After the first frost, cut back the foliage to 2-3 inches above the ground to prevent disease and pests from overwintering. Callas are cold-hardy in USDA Zones 8-11, but even in colder zones, the rhizomes survive if protected with 4-6 inches of mulch. In spring, remove old mulch and replace it with fresh material once new growth appears.
Divide clumps every 3-4 years in early spring to prevent overcrowding. Dig up the rhizomes, separate sections with 2-3 healthy growth points each, and replant immediately. This rejuvenates the plant and ensures stronger blooms. I always sterilize my tools with rubbing alcohol between cuts to prevent spreading disease.
🌿 Step 5: Overwinter and Prepare for Next Season
In colder climates, protect callas with a thick layer of straw or leaves once temperatures drop below 30°F. This insulation keeps rhizomes from freezing while allowing airflow to prevent rot. In spring, remove the mulch as soon as new shoots emerge—usually by late March or early April, depending on your zone.
Watch for yellowing leaves in early spring, which signals new growth. This is your cue to fertilize lightly with a balanced formula and resume regular watering. Callas are low-maintenance once established, but a little attention in their first year ensures they thrive for decades.
Tips & tricks for perfect calla lily planting and care
These pro tips will help you avoid common pitfalls and keep your calla lilies thriving for years to come.
Soil Preparation Insight: When amending heavy clay soil with the recommended 2-3 inches of compost, mix it thoroughly into the 12-inch loosened zone—don't just top-dress. I've found that adding a handful of perlite to the compost mix improves drainage even further while maintaining moisture retention. This creates the perfect balance for calla rhizomes that hate soggy conditions but need consistent moisture during establishment.
Rhizome Orientation Secret: The upward-facing growth points (eyes) on your rhizomes are non-negotiable—planting them any other way can delay or prevent emergence. I've seen gardeners accidentally bury them upside-down, which results in weak, stunted growth. To prevent this, I mark the eyes with a pencil before planting, then verify orientation before covering with soil. This simple step ensures your plants emerge strong and healthy.
Watering Wisdom: During the critical 4-6 week establishment period, I check soil moisture by sticking my finger 2 inches deep—this is where the roots are actively growing. If it feels dry, water thoroughly; if it's still damp, wait another day. Overwatering is the #1 cause of rhizome rot, while underwatering stresses new growth. A moisture meter is worth the investment if you're unsure about your watering touch.
Winter Protection Strategy: When temperatures drop below 30°F in colder zones, I double up on protection by first covering the ground with cardboard (to block drafts), then adding 4-6 inches of straw or leaves on top. This creates an insulating layer that prevents freezing while still allowing airflow to prevent rot. In spring, I remove the mulch as soon as I see those first yellowing leaves—this signals new growth is ready to break through.
Pro Tips for Calla Lily Perennial
- These pro tips will help you avoid common pitfalls and keep your calla lilies thriving for years to come.
- Soil Preparation Insight: When amending heavy clay soil with the recommended 2-3 inches of compost, mix it thoroughly...
- Rhizome Orientation Secret: The upward-facing growth points (eyes) on your rhizomes are non-negotiable—planting them ...
Frequently asked questions
Can calla lilies survive winter in cold climates?
Yes! Hardy varieties like Zantedeschia aethiopica (white calla) can tolerate USDA zones 8–11. In colder zones (7 and below), mulch heavily or dig up tubers to store indoors in dry peat moss or vermiculite. Pro tip: Wait until after the first frost to lift tubers for overwintering!
How long does it take for calla lilies to bloom after planting?
Patience is key! If planting tubers in spring, expect blooms 8–12 weeks later. Established perennials may bloom earlier (late spring to summer). For faster results, plant potted callas in early spring—they often flower within 6–8 weeks.
Why aren’t my calla lilies blooming?
Common culprits include:
- Insufficient light: Callas need 6+ hours of sun (partial shade in hot climates).
- Overcrowded tubers: Divide clumps every 3–4 years for better blooms.
- Poor soil: Amend with compost and ensure moist, well-draining soil.
- Lack of nutrients: Feed with balanced fertilizer (10-10-10) in spring.
If the problem persists, your variety might be sterile (like Z. elliottiana), which focuses on foliage instead of flowers.
What’s a cold-hardy alternative to traditional calla lilies?
If you love callas but need even more cold tolerance, try:
- Arum lilies (Zantedeschia rehmannii): Thrives in zones 7–11, with striking purple-spotted leaves.
- Jack-in-the-pulpit (Arisaema spp.): Hardy to zone 4, with unique hooded blooms.
- Calla-like plants: Richardia or Philodendron ‘Hope’ for tropical vibes with less fuss.
For a true calla lookalike, Z. aethiopica is your best bet for cooler climates!
How do I divide calla lily tubers to keep them healthy?
Divide every 3–4 years in early spring (before new growth):
- Dig up tubers and rinse off soil.
- Separate into 3-inch sections, ensuring each has 1–2 “eyes” (growth points).
- Trim rotten or mushy parts with a clean knife.
- Replant 2–3 inches deep in fresh soil.
Discard shriveled or pest-damaged tubers. Pro tip: Soak tubers in neem oil solution before replanting to prevent rot!
Wrapping up and next steps
Incorporating calla lilies into your garden is a fantastic way to add elegance and resilience with minimal fuss. These cold-hardy perennials offer year-round beauty, thriving in diverse climates and requiring little maintenance once established.
Whether you’re a seasoned gardener or just starting, their striking blooms and adaptability make them a must-have for any landscape.
Ready to transform your outdoor space? Start by selecting the perfect variety for your zone, then grab your gardening tools and get planting! Watch your garden flourish with these stunning, low-maintenance perennials. 🌿✨